Grafting Orange Trees – How to Graft an Orange Tree by T-budding
In this step-by-step guide to grafting orange trees, learn how to graft an orange tree by T-budding, a method of orange grafting that is very easy and that gives a good success rate. The T-bud is commonly used to propagate orange trees in citrus nurseries and is also useful for budding orange trees in the home garden.
T-budding can be used for grafting oranges in parts of the year when the rootstock is actively growing. If the rootstock is not actively growing, the chip bud is a good alternative. Bud grafts such as the T-bud and the chip bud are useful to conserve budwood since they only use one orange tree bud per graft. If there is more budwood available, scion grafting techniques such as the cleft graft, the bark graft, and the z-graft also work well for grafting new orange trees.
Grafting Orange Trees – How to Graft an Orange Tree by T-budding – YouTube Video
In addition to this step-by-step orange grafting tutorial, I have also made a YouTube video (see below) showing how to graft an orange tree by T-budding.
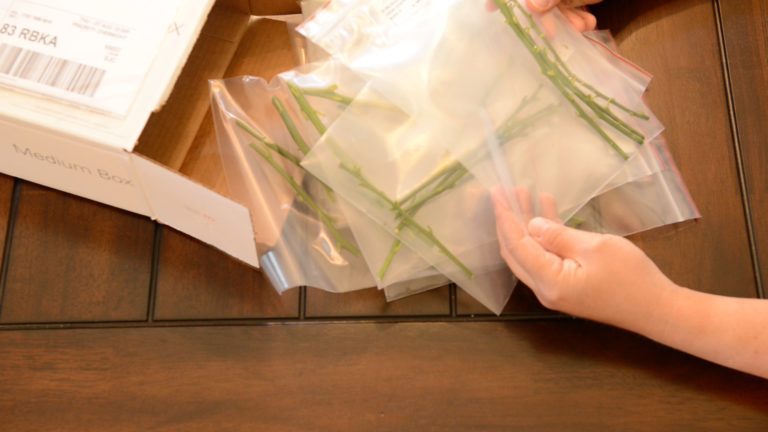
Citrus Budwood from a Disease-free Source
Orange tree cuttings have the potential to spread tree-killing diseases. It is often not apparent when a tree is infected with a fatal disease. This makes the source of citrus budwood for grafting very important.
In California we now have both exotic diseases that kill citrus trees and also the insects that spread the diseases. The situation is so severe that it now against the law in California to graft orange tree cuttings taken from backyard citrus trees. To save our trees from deadly disease, hobbyists in California no longer swap citrus cuttings with friends. We now instead order our budwood at a nominal cost from the Citrus Clonal Protection Program (CCPP), a program that exists to provide disease-free budwood for the grafting of citrus trees.
The CCPP will ship budwood anywhere in the world where the local government allows it. Many citrus growing regions where CCPP budwood is not allowed have their own disease-free citrus budwood programs. Here I have created a web page that lists some other programs: Citrus Budwood Programs.
The below YouTube video goes through in detail the process of setting up an account and placing a budwood order with CCPP.
Disinfecting Grafting Tools
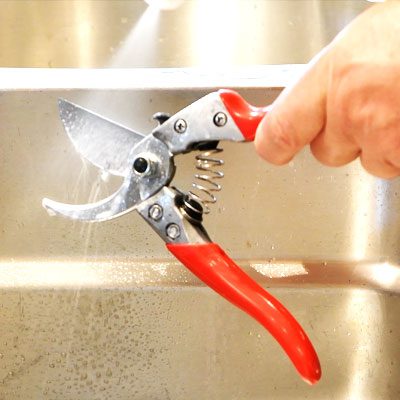
In order to both maximize the probability that the graft lives and also to prevent the spread of disease from tree to tree, it is important to disinfect grafting tools between grafts. To learn more about disinfecting grafting tools, please see the following link: Disinfecting Grafting Tools.
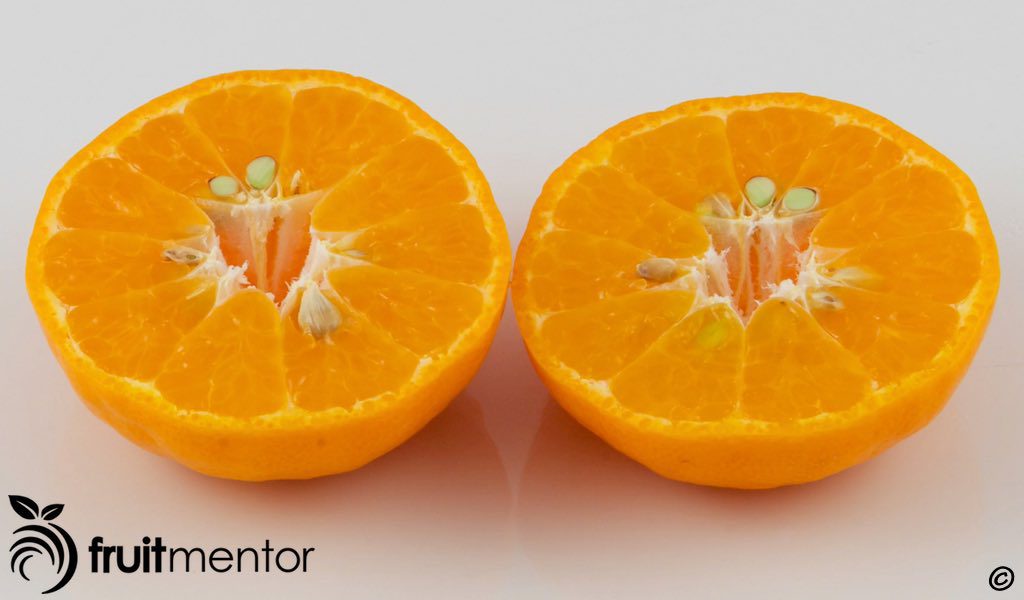
Avana Tardivo Mandarin Orange
The fruit that I will be grafting is a late heirloom mandarin orange from Italy called Avana Tardivo. I would never expect to see a tree of a citrus variety such as this in a nursery. The CCPP has hundreds of unusual citrus varieties available including Avana Tardivo. To make my own tree, I ordered the budwood from CCPP.
Rootstock
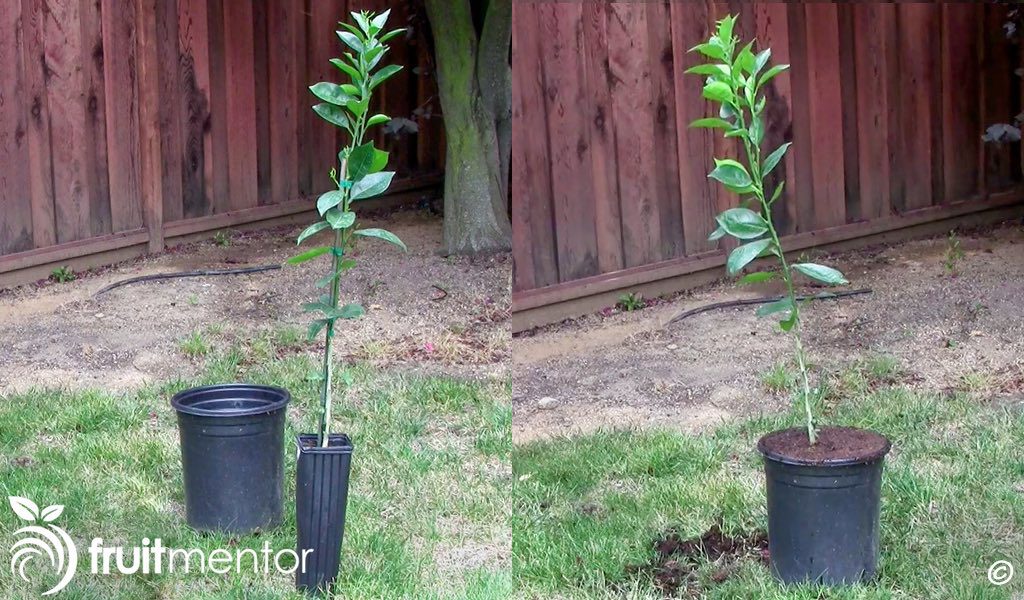
For my rootstock I bought an inexpensive grafted orange tree from a reputable local nursery. The orange variety is a common one that I already have, but the rootstock will work well for Avana Tardivo. I will replace the existing grafted orange variety with Avana Tardivo. The small pots that these inexpensive orange trees come in tend to dry out very quickly, so my first step is to repot it into a larger pot.
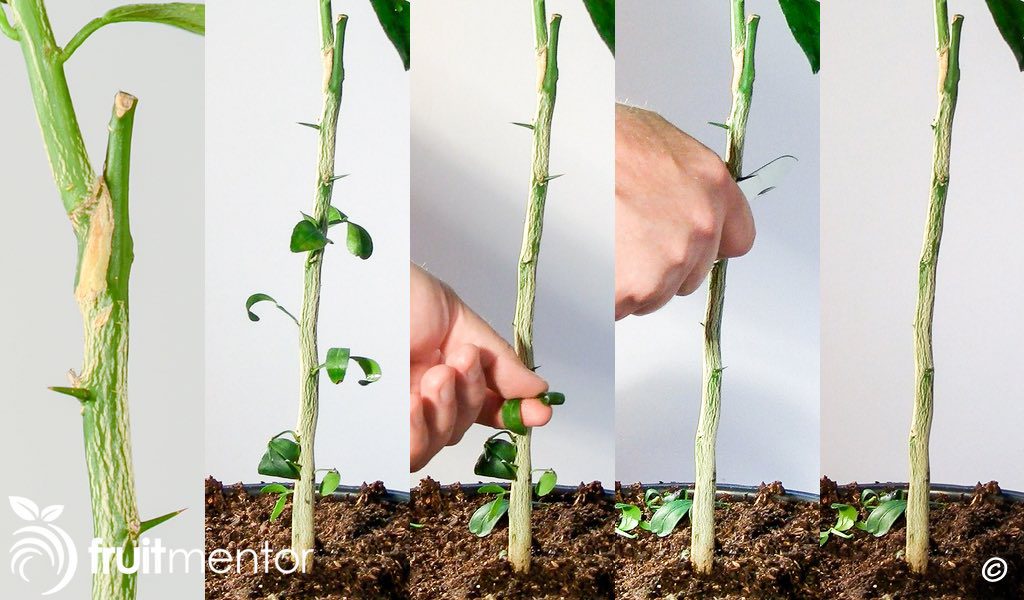
Removing Leaves and Thorns
I remove the leaves and thorns before grafting.
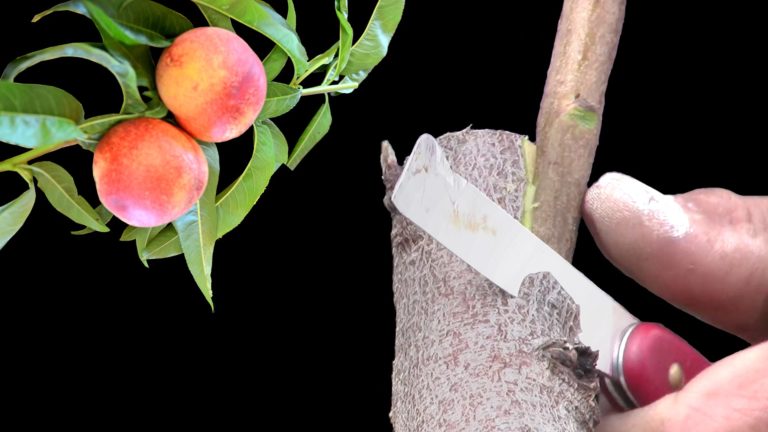
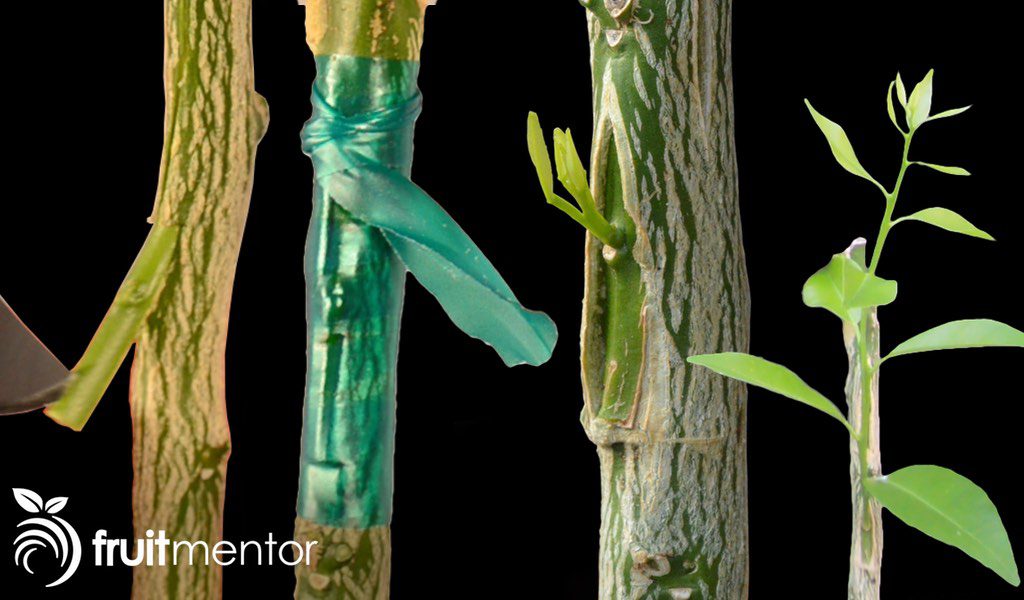
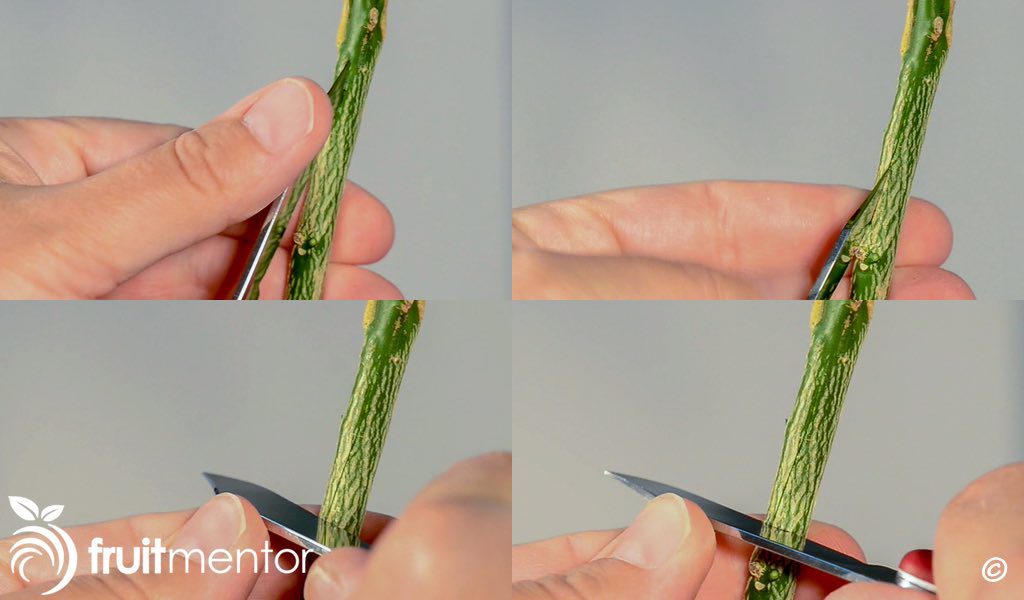
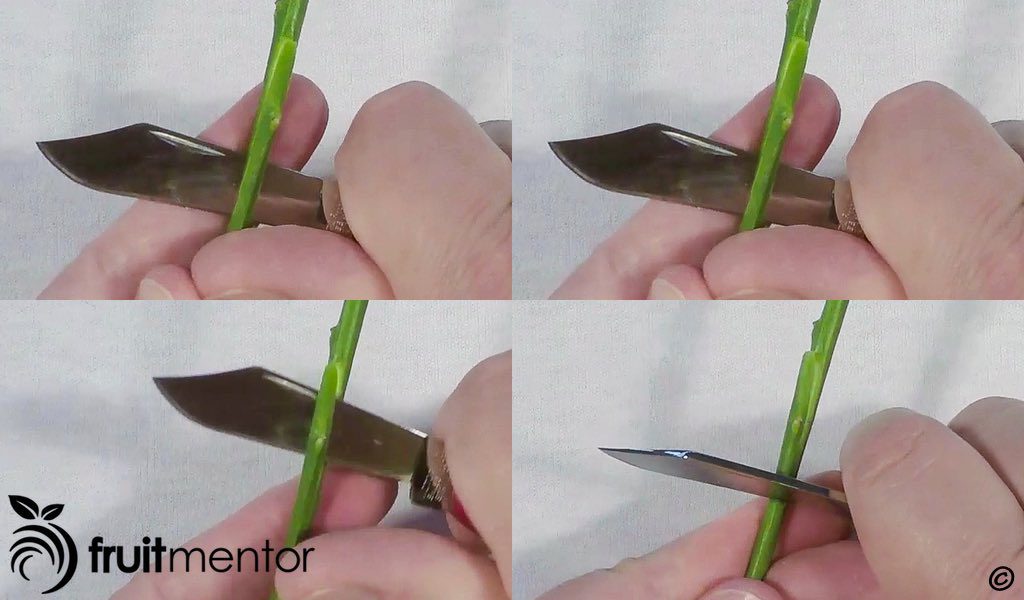
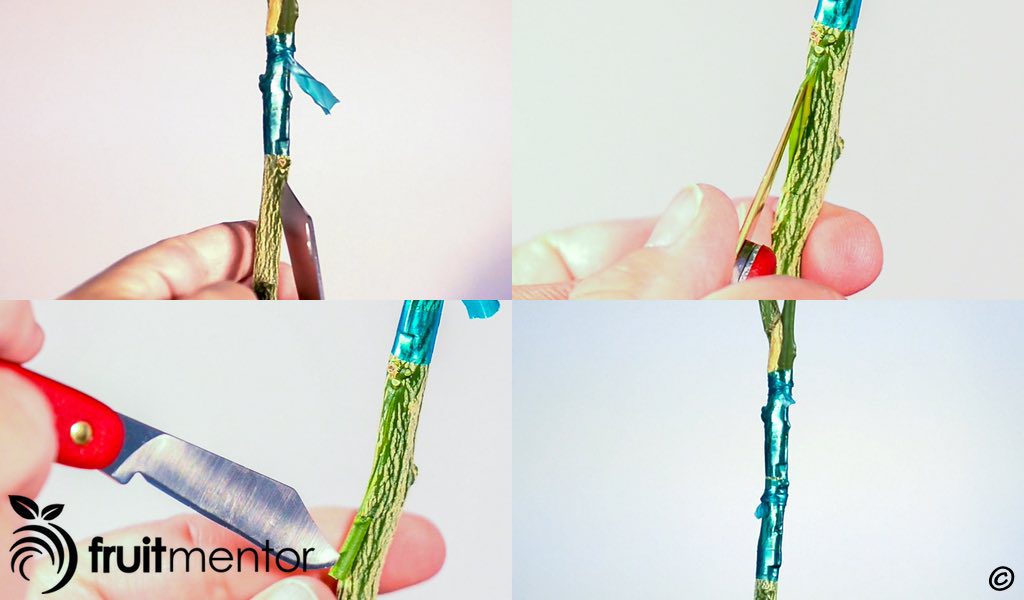
Cutting the T
I cut an upside-down T into the rootstock slightly below the original graft. An upright T would also work, but the upside-down T is said to help to keep water out and may work better in a rainy climate. It does not take much pressure to make these cuts. The knife will go through the bark easily and then stop at the wood. There is no reason to cut into the wood.
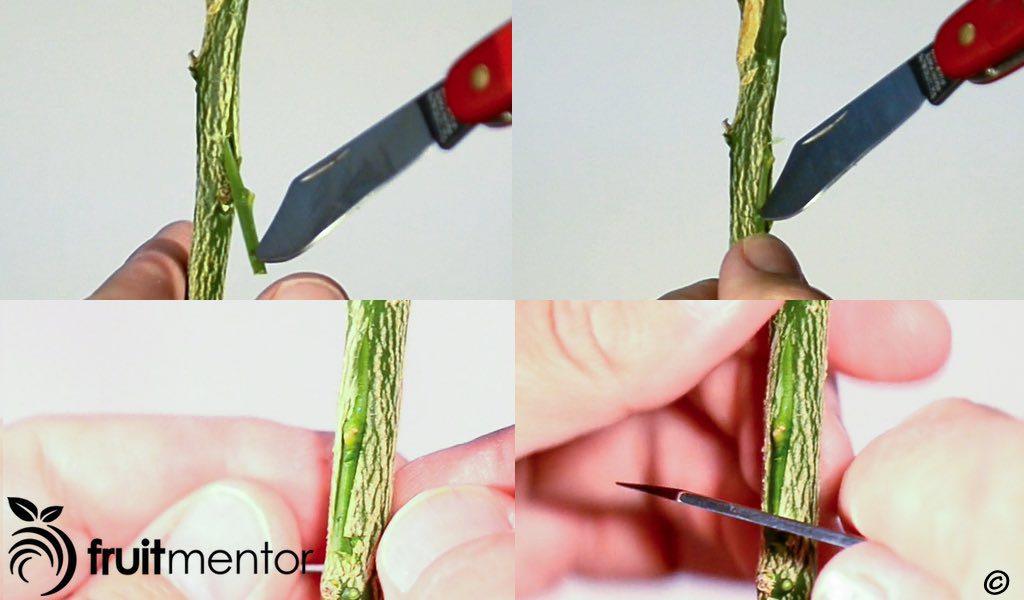
Peeling the Bark Back
Next I use the bark lifter on my grafting knife to peel the bark back where I made the vertical cut. I will insert the bud graft under these flaps in the bark. If it had been difficult to peel the bark back, I would have used the chip graft instead.
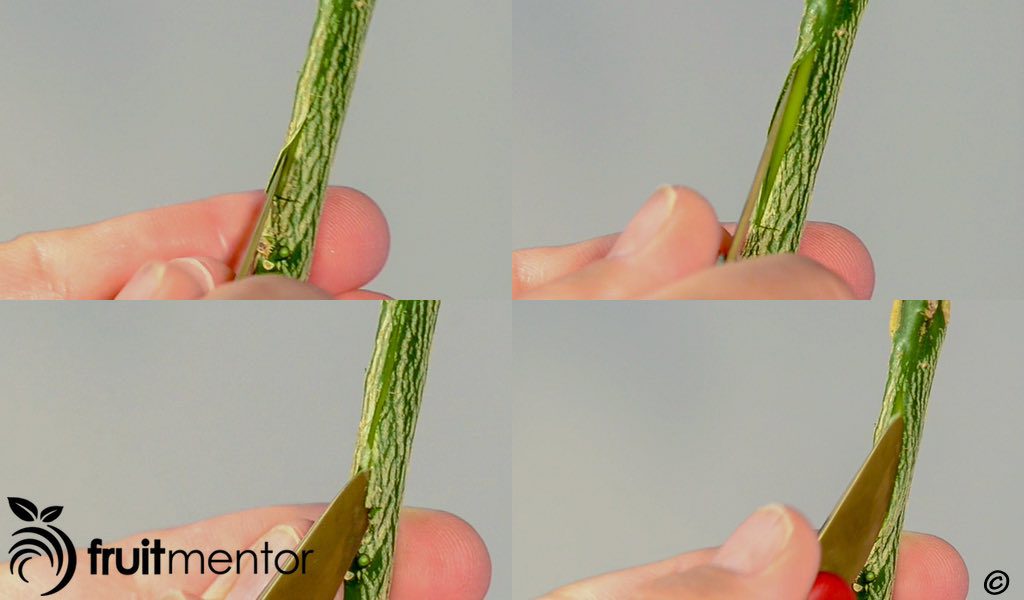
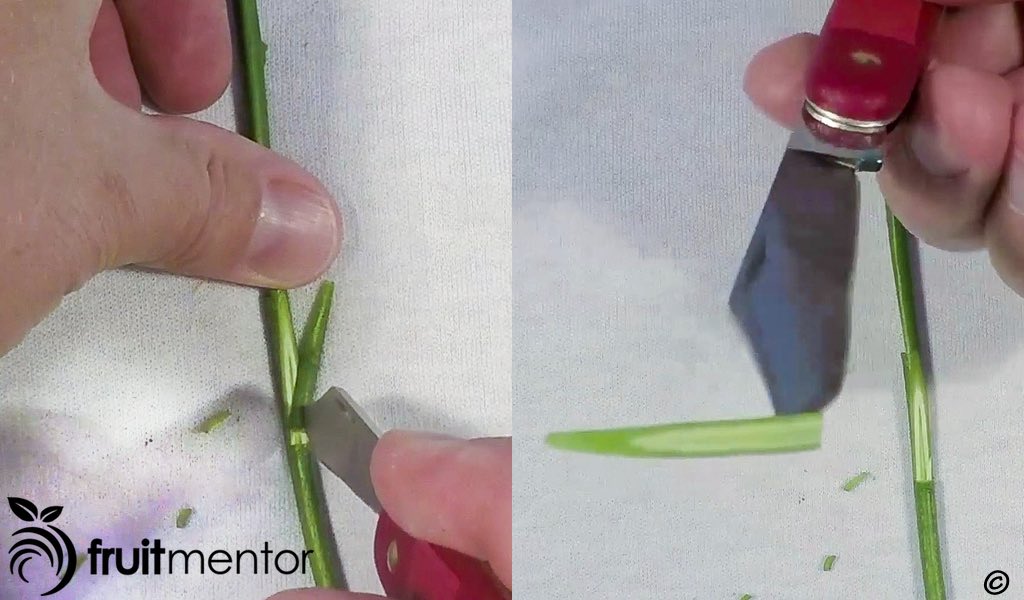
Cutting the Bud
Next I cut the bud by slicing underneath it with the knife almost flat against the budstick. I withdraw the knife after slicing underneath the bud and remove the bud by cutting into the wood below the bud.
Picking up the Bud with the Knife
It is best to avoid touching the cut surfaces of the bud. Any sort of contamination can cause the bud graft to fail. Whenever I accidentally drop a cut bud on an unclean surface, I always discard it and cut a new one. Often the cut bud piece will still have a petiole where the leaf was attached. The petiole makes for a convenient handle to pick up the bud. In this case the petiole had fallen off, so I picked up the bud with my knife to avoid touching the cut surfaces.
Note that there is wood on the back side of the bud. There is no reason to remove this wood and it should be left on the bud. An attempt to remove could lead to contamination and cause the graft to fail.
Inserting the Bud Underneath the Bark Flaps
Next I insert the bud piece underneath the bark flaps and push it all the way up. I cut off the excess portion of the bud piece that was sticking out at the bottom.
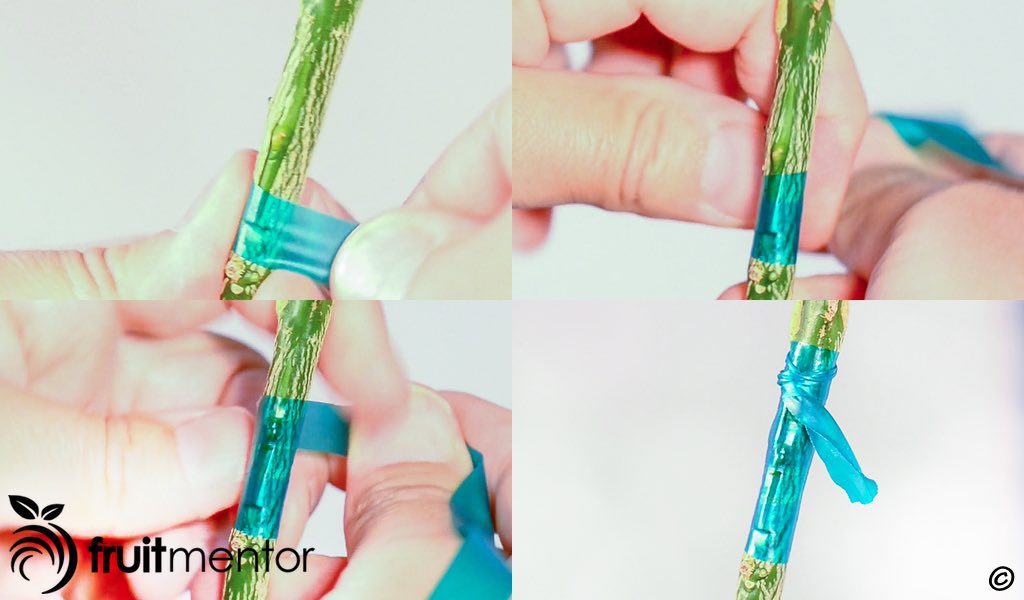
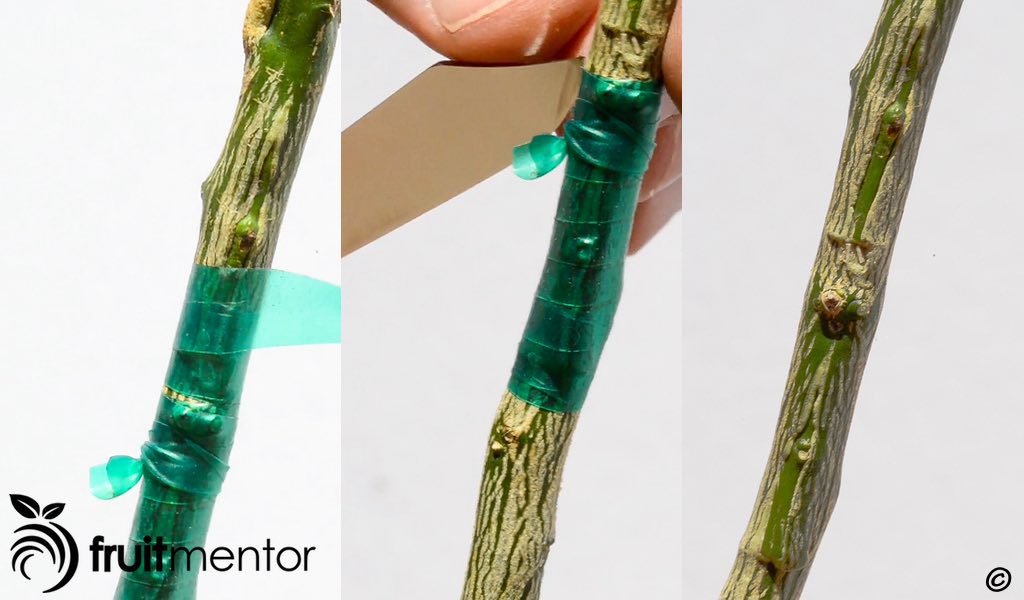
Wrapping the Bud with Vinyl Grafting Tape
Next I wrap the bud tightly with vinyl grafting tape, starting at the bottom and wrapping upward. Wrapping tightly is important to give good contact between the cambium layer of the bud and that of the rootstock. Cambial contact is essential for all grafting techniques.
Vinyl tape makes for a good wrapping material because it can stretch without breaking. I have tried T-budding using parafilm as the wrapping material when I did not have vinyl tape on hand. I found that the parafilm was not strong enough. In several cases the bark flaps broke through the parafilm before the grafts healed and the buds died. Since the cost of a roll of vinyl tape is less than the cost of a budstick, I now keep a roll on hand for T-budding. I have created a web page that shows where grafting supplies and tools such as vinyl tape, grafting knives, and saws can be found: Grafting Supplies and Tools.
Grafting a Second Bud as a Backup
Professional grafters have perfected their technique and approach 100% success rate when using a single bud for tree budding. When a T-Bud graft fails on a commercially grafted orange tree, the tree is typically rebudded.
For a home gardener who has not yet mastered the technique, grafting a second bud can increase the chances of success. Successful grafting of an orange tree will then be possible even if only one of the two buds lives.
Unwrapping the Buds
I moved the tree into a shady area for a three week healing period. At the end of the healing period, I unwrapped the grafts and found that both were still green, an indication of success.
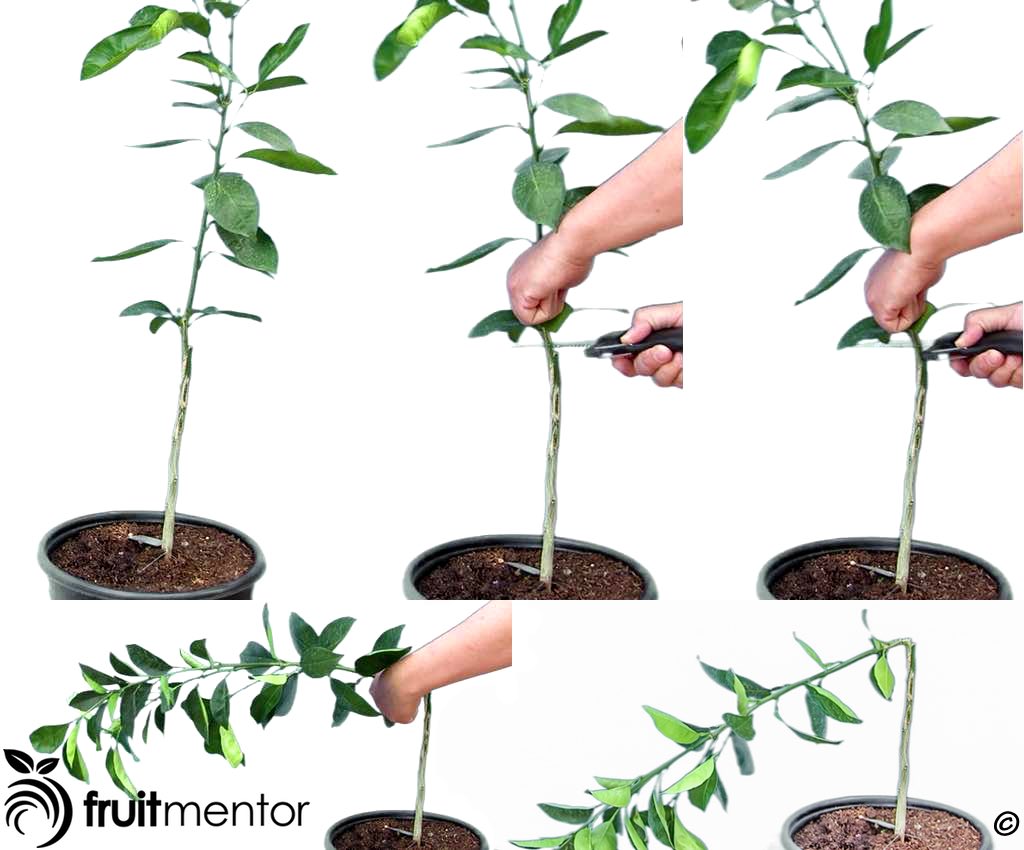
Forcing a Bud to Grow by Overcoming Apical Dominance
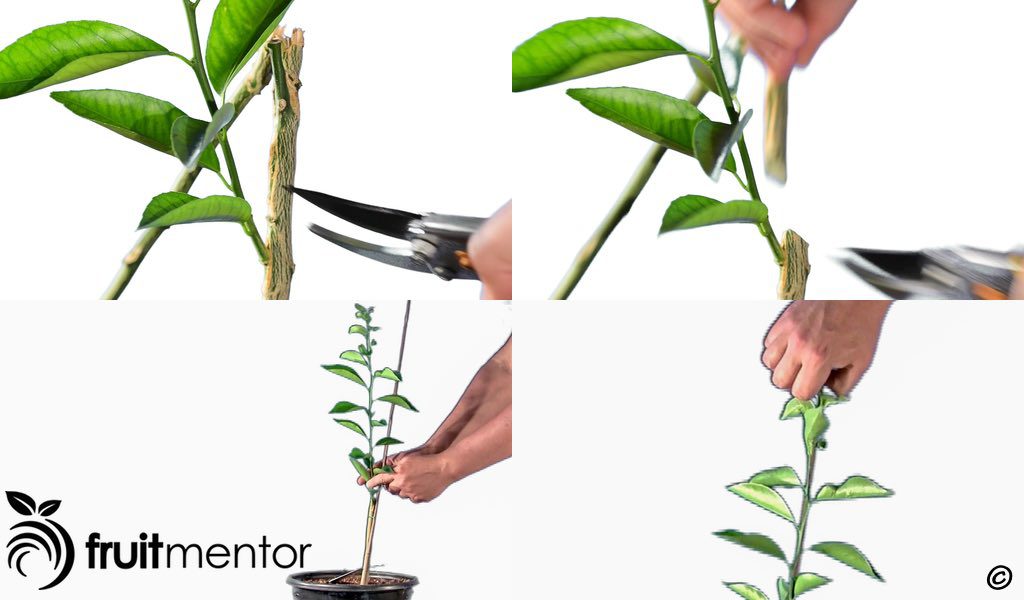
If left as they are, the grafted buds do not tend to grow because of a phenomenon known as apical dominance. Natural plant hormones that come from buds higher in the tree discourage the growth of the grafted buds. To succeed in grafting orange trees or in grafting trees of any kind, apical dominance must be overcome to encourage the growth of the grafted buds. Apical dominance can be broken by sawing halfway through the roostock above the buds and pushing the top of the rootstock over.
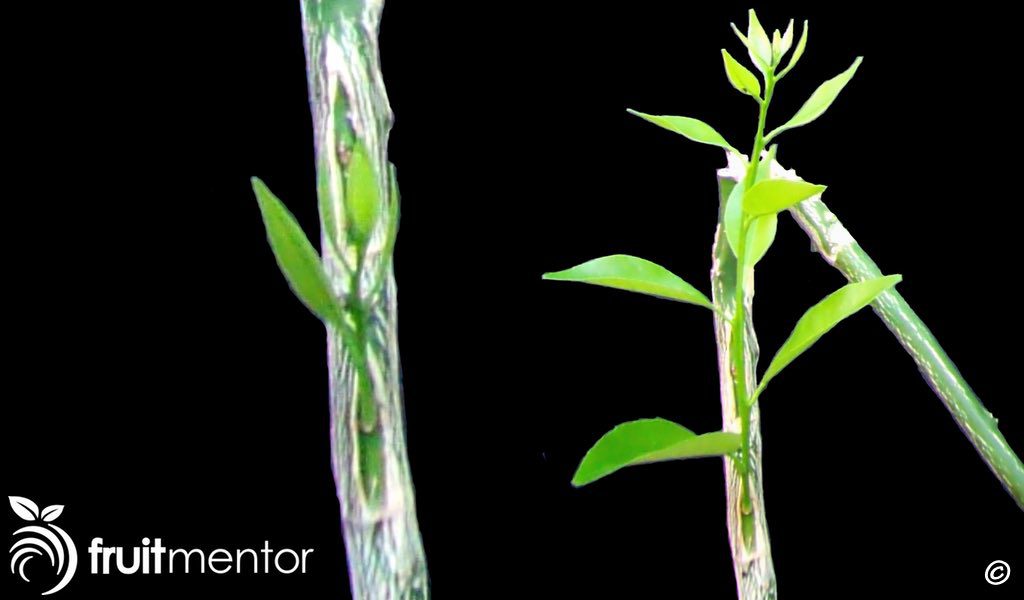
Growth of the Buds
After apical dominance was overcome, the bottom bud began to grow.
Pruning the Rootstock and Staking the Tree
After more growth of the orange graft, I cut off the top of the rootstock and staked the tree. To encourage the growth of branches, I again broke apical dominance by pinching off the buds at the top of the tree.
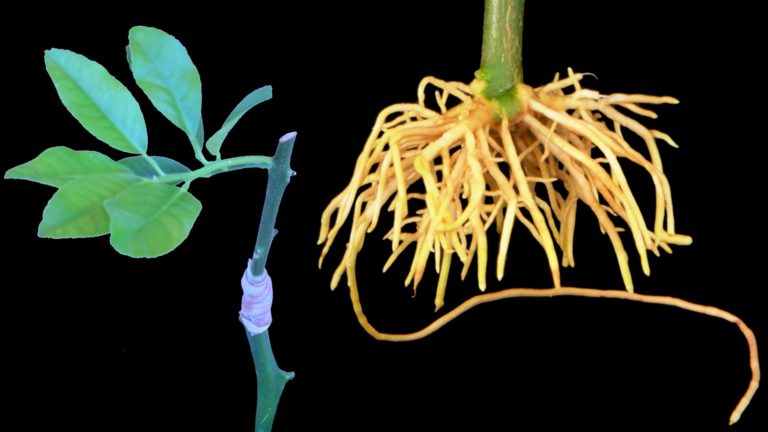
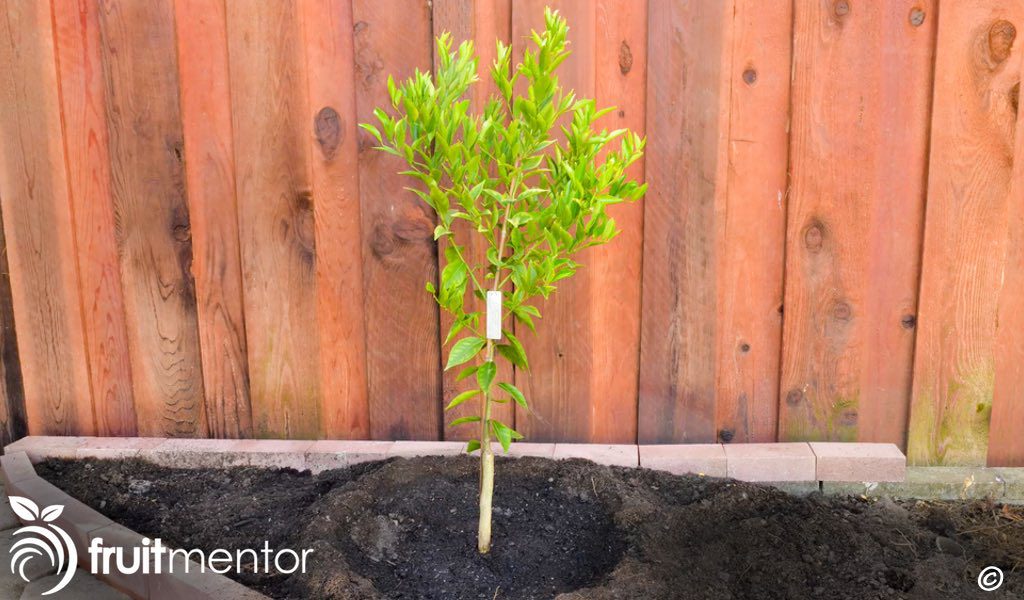
Grafted Avana Tardivo Mandarin Orange Tree
Here is a photo of the grafted orange tree showing the new branches.
Save Trees by Sharing
Please share this article with anyone that you think may be interested in grafting orange trees or citrus of any other variety. Knowledge of the importance of using a registered disease-free budwood source when grafting citrus will help to prevent the accidental spread of deadly citrus diseases and will save trees.
Resources for Californians
Please visit CaliforniaCitrusThreat.org for more information on how to stop the spread of deadly citrus disease.
California Law Regarding Citrus Propagation
In California, the collection of any citrus propagative materials, including budwood and seeds, from non-registered sources is illegal. Any citrus trees grown or grafted in California must come from source trees registered with either:
- The Citrus Nursery Stock Pest Cleanliness Program, administered by the California Department of Food and Agriculture, or
- The Citrus Clonal Protection Program, located at the University of California at Riverside.
Funding
This article was funded by a grant from California’s Citrus Research Board.