Grafting Fruit Trees Step-by-Step
This step-by-step guide to grafting fruit trees shows how to graft a tree using a very useful technique called the Z-graft.
Z-grafting is a scion grafting technique that is very helpful for grafting trees in situations where the scion and rootstock have different diameters. I have found the Z-graft especially useful for grafting citrus trees when the scion diameter is greater than that of the rootstock. It is useful both for grafting new trees and also to add new varieties to established trees.
Grafting Fruit Trees Step-by-Step by Z Grafting – YouTube Video
In addition to this step-by-step grafting guide, I have also made a YouTube video (see below) showing how to graft fruit trees with the Z-graft.
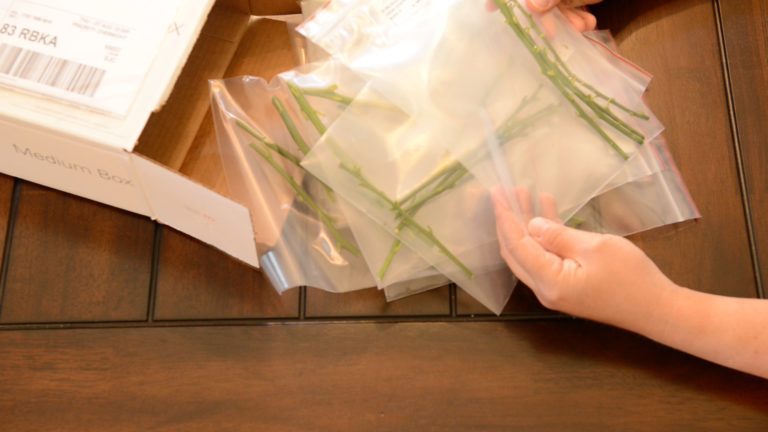
Citrus Budwood from a Disease-free Source
Citrus cuttings have the potential to spread tree-killing diseases. It is often not apparent when a tree is infected with a fatal disease. This makes the source of citrus budwood for grafting very important.
In California where I live, we now have both exotic diseases that kill citrus trees and also the insects that spread the diseases. The situation is so severe that it now against the law in California to graft with cuttings taken from backyard citrus trees. To save our trees from deadly diseases, hobbyists in California no longer swap citrus cuttings with friends. We now instead order our budwood at a nominal cost from the Citrus Clonal Protection Program (CCPP), a program that exists to provide disease-free budwood for the grafting of citrus trees.
The CCPP will ship budwood anywhere in the world where the local government allows it. Many citrus growing regions where CCPP budwood is not allowed have their own disease-free citrus budwood programs. Here I have created a web page that lists some other programs: Citrus Budwood Programs.
The below YouTube video goes through in detail the process of setting up an account and placing a budwood order with CCPP.
Disinfecting Grafting Tools
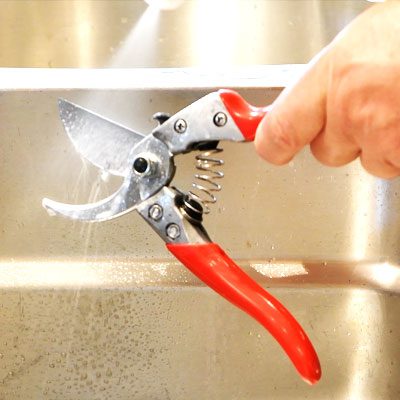
In order to both maximize the probability that the graft lives and also to prevent the spread of disease from tree to tree, it is important to disinfect grafting tools between grafts. To learn more about disinfecting grafting tools, please see the following link: Disinfecting Grafting Tools.
Grafting the Valentine Pummelo Hybrid
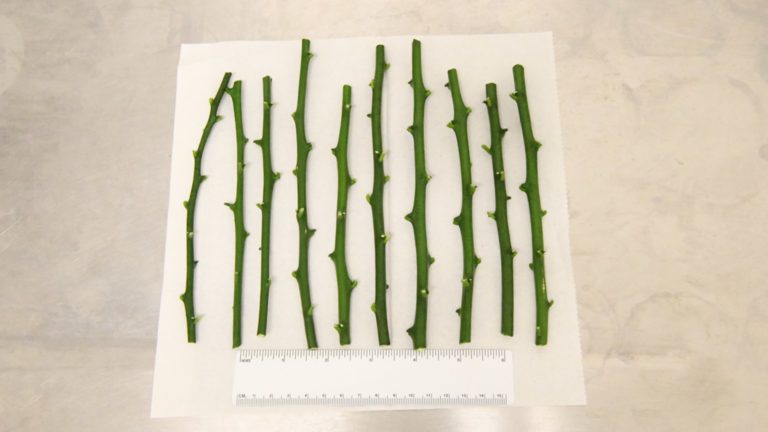
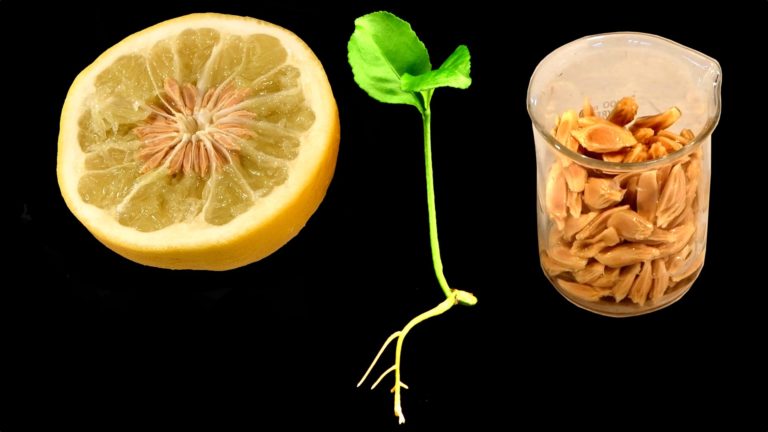
The fruit grafted in this article is the Valentine pummelo hybrid, a delicious fruit created by the citrus breeders at the University of California, Riverside by crossing the Siamese Sweet Pummelo with a hybrid of a mandarin orange and a blood orange.
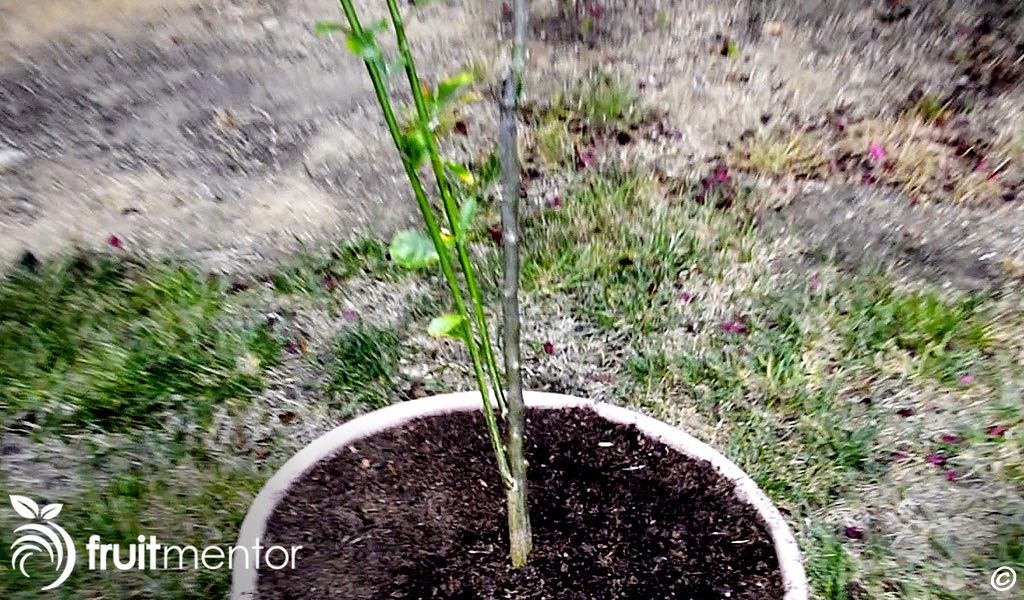
Rootstock Suckers
I had neglected this Cara Cara pigmented navel orange tree after I realized that the previous owners of my house had already planted a Cara Cara tree. Normally I would prune off roostock suckers like these, but since I already had a Cara Cara tree I decided to graft to the roostock suckers to convert this tree into a Valentine Pummelo tree.
Grafting a Large Diameter Scion to a Smaller Diameter Rootstock
Since the diameters of the rootstock suckers were smaller than the diameters of my Valentine Pummelo scions, I decided to graft my tree with the Z-graft. When scion grafting fruit trees I usually prefer a cleft graft or a bark graft, but when the diameter of the budwood that I receive from CCPP is larger than the branch to which I would like to graft, the Z-graft is a good choice.
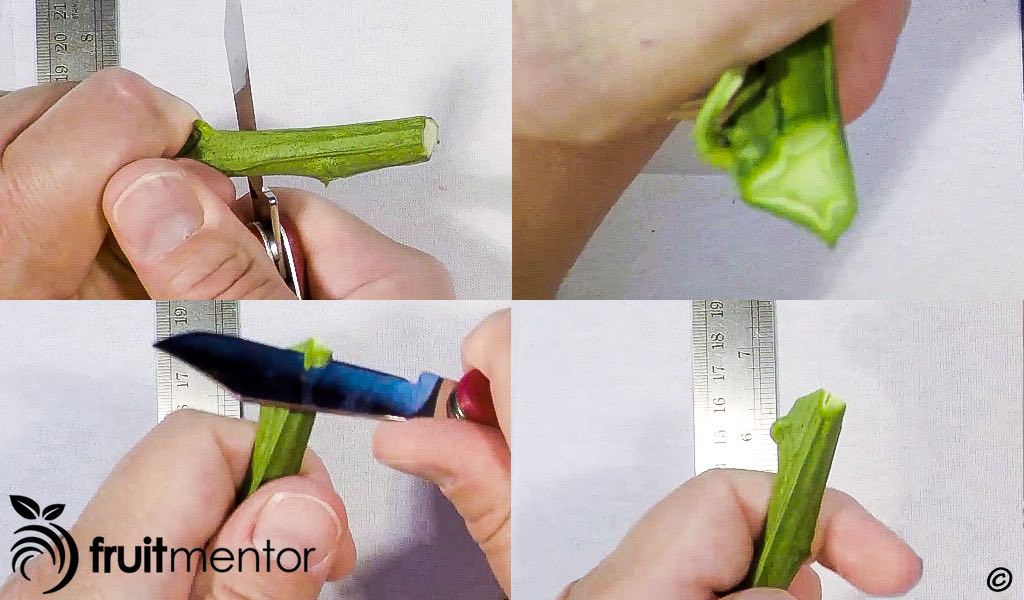
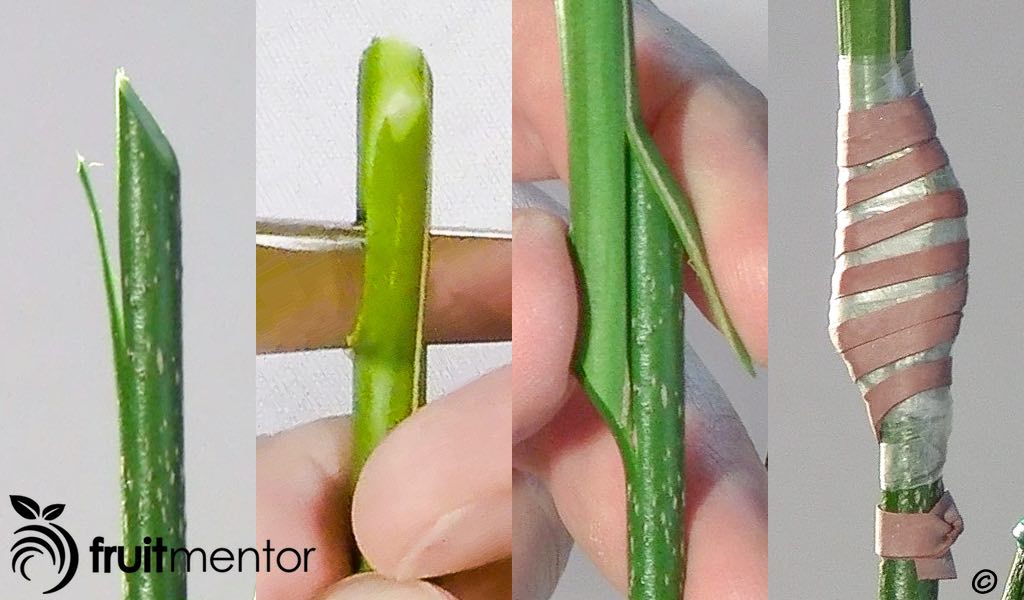
Cutting the Top off of the Rootstock
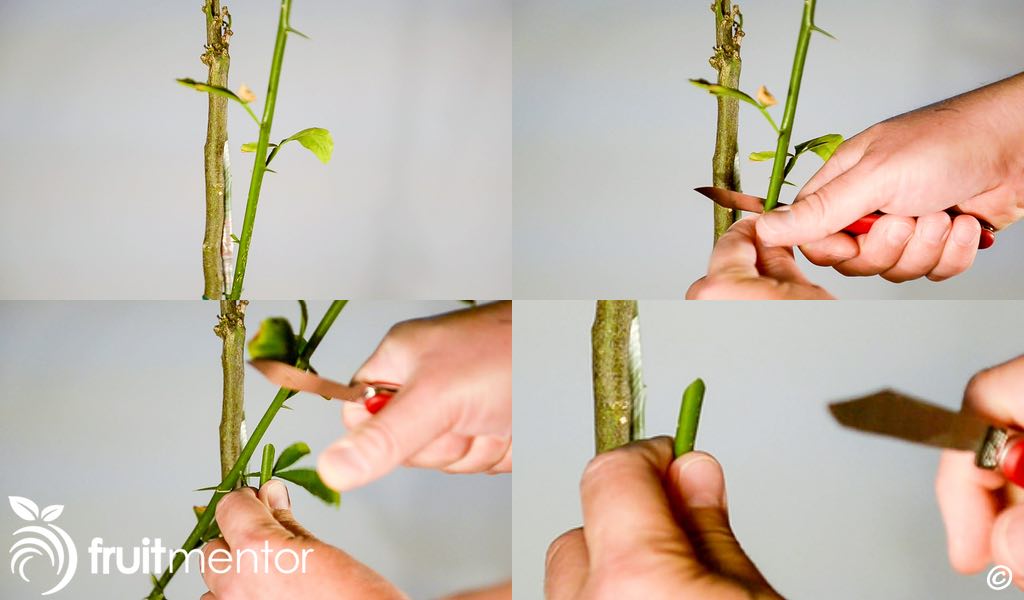
The first step is cut off the top of the rootstock sucker at about a 45 degree angle.
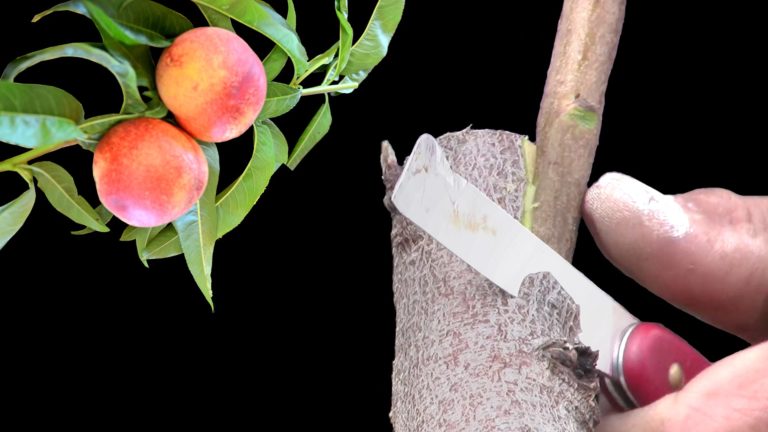
Cutting a Strip in the Rootstock
The next step is to cut off a small piece of the longer end of the rootstock at a very slight angle. Then I cut a thin strip in the longer end of the rootstock and leave it attached.
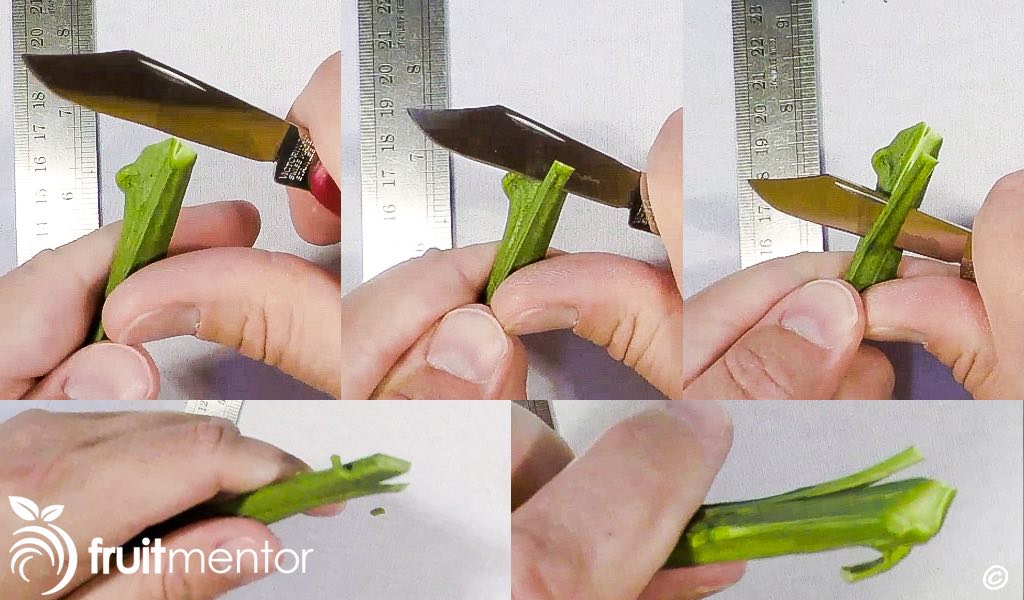
Cutting the Scion
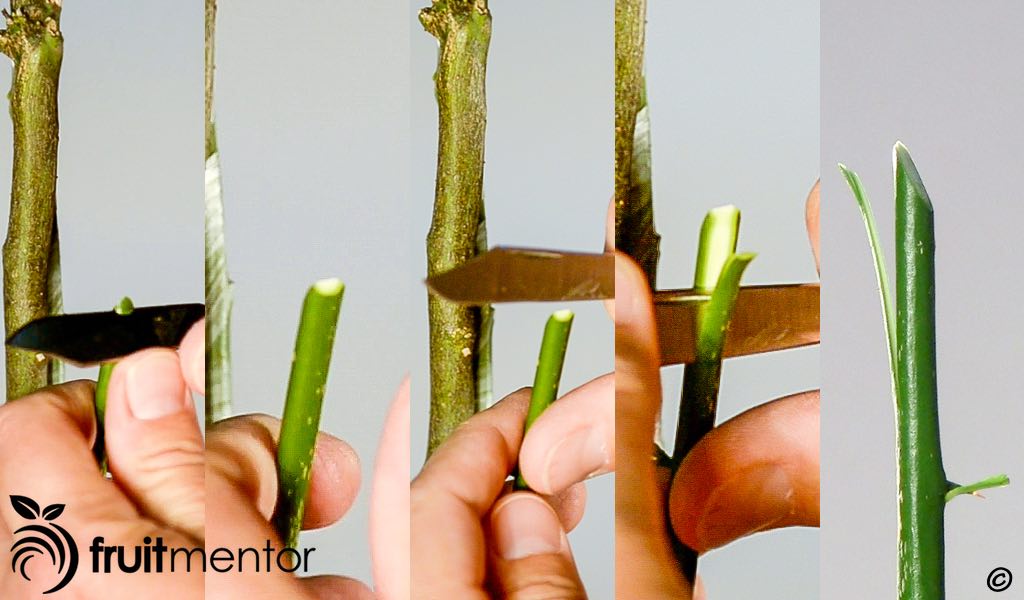
Next I cut off the bottom of the scion at about a 45 degree angle and cut off a small piece of the longer end. Sometimes scions have an angular shape such as this one does. With some tree grafting techniques this can cause a problem. With the Z-grafting technique I will use the angular shape to my advantage by cutting a thin strip from an angled part of the scion in the next step.
I then cut a strip in the longer end of the scion. In order to make cambium contact with the rootstock, it is important that the width of this strip be less than the diameter of the rootstock.
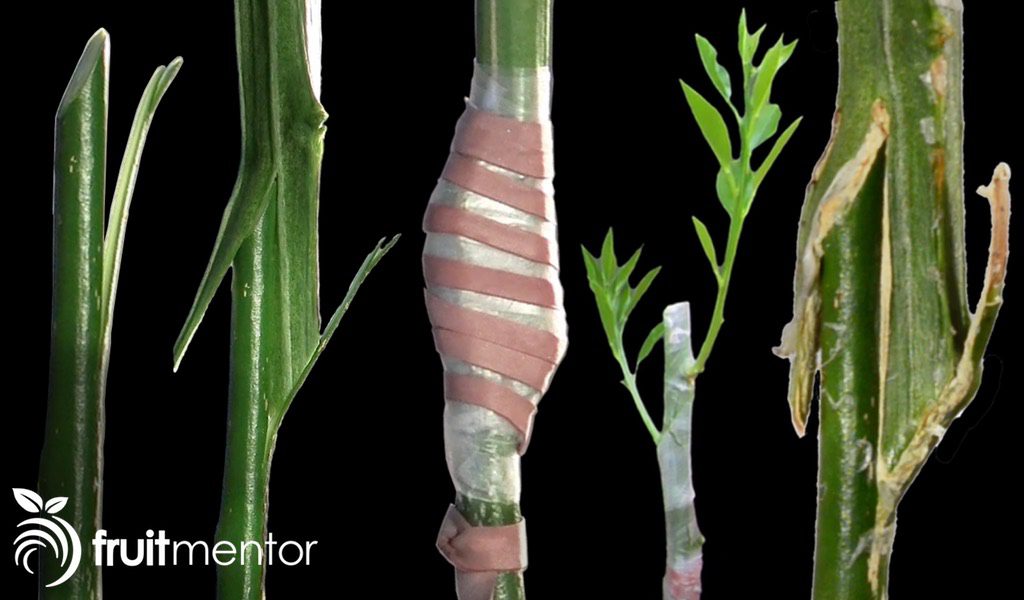
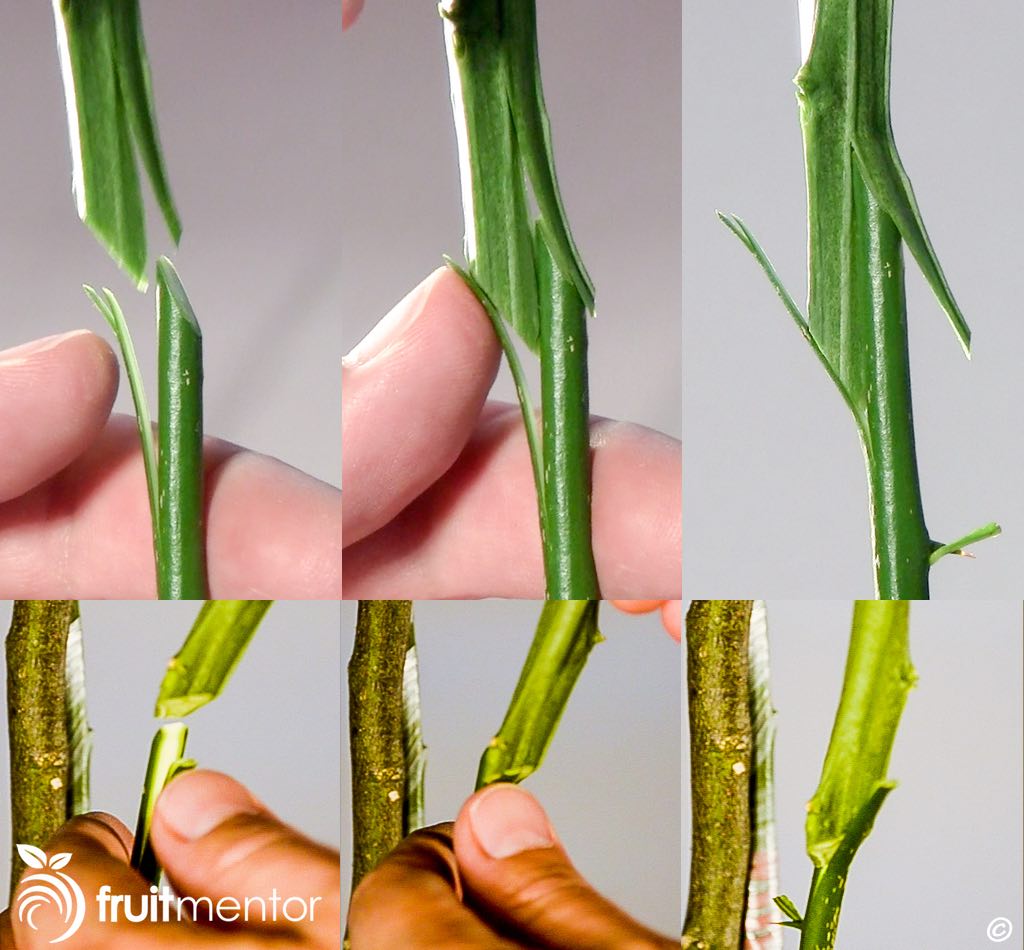
Fitting the Scion and Rootstock Together
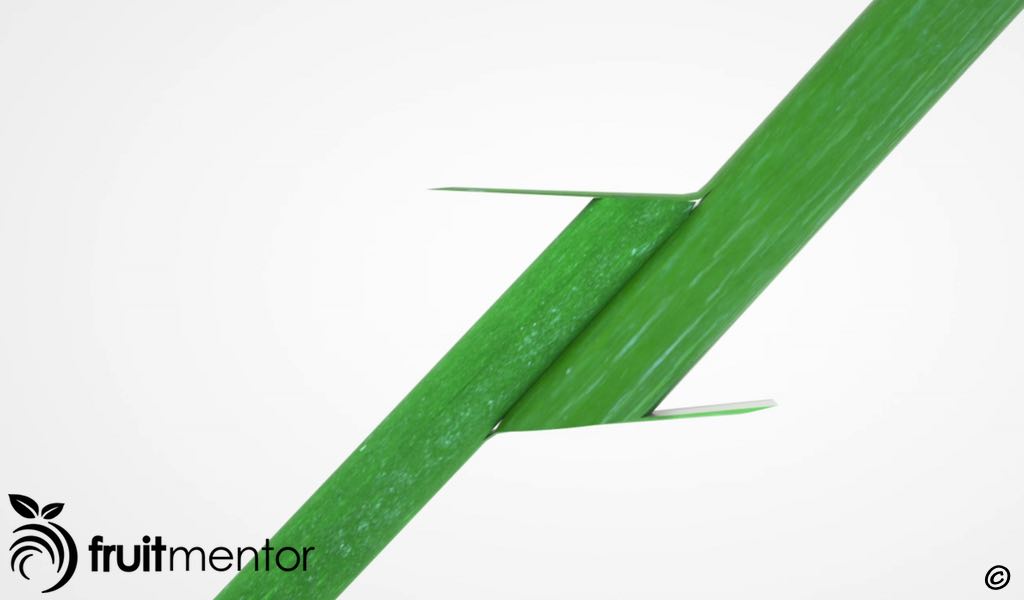
Next I fit the scion into the rootstock to form the Z.
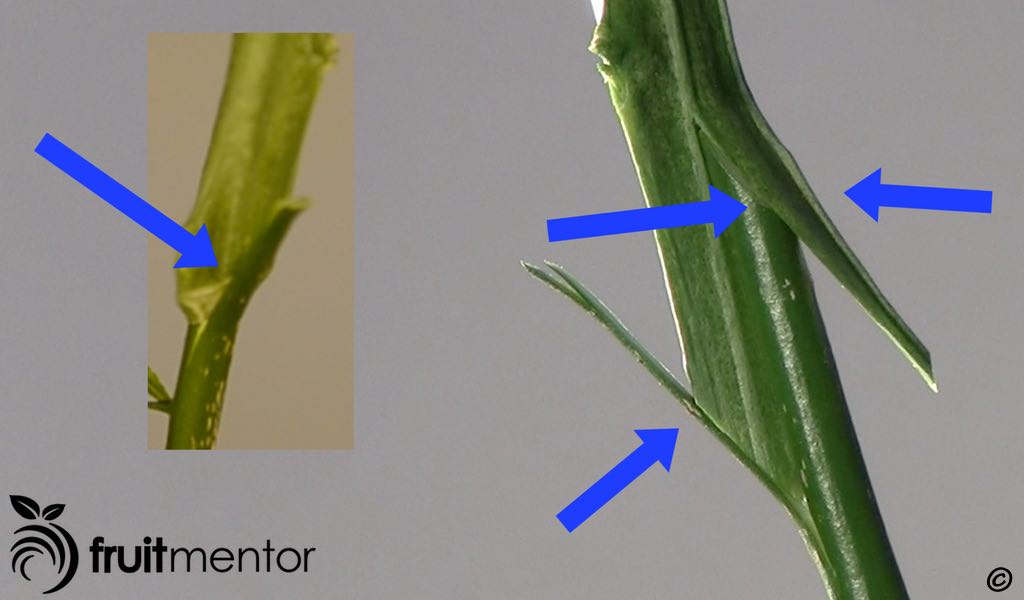
Cambium Contact
The cambium of a tree is a thin layer of plant tissue between the bark and the wood. The goal with all grafting techniques is to connect the cambium of the scion to the cambium of the rootstock. Grafting fruit trees with the Z-graft creates many points of contact between the cambium layers of the rootstock and scion. This makes for a successful graft and a strong graft union.
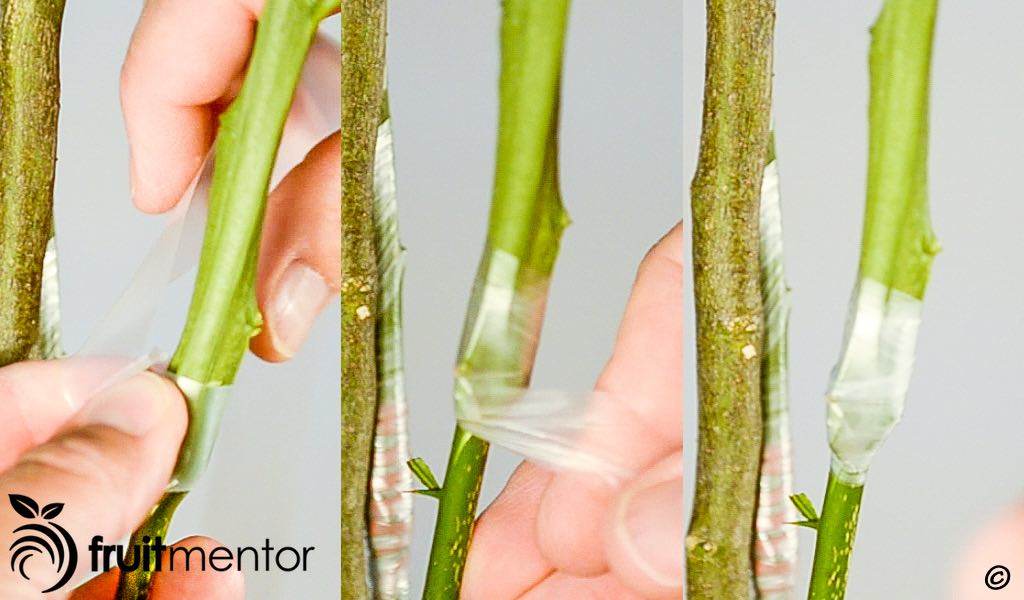
Wrapping with Parafilm-M
I wrap the graft union with a product called parafilm-M to seal the graft and hold it in place. For cleft grafting and bark grafting I use a different type of parafilm, but I find that parafilm-M is easier to stretch. I felt it would be easier to keep the cambium layers lined up while wrapping if I used parafilm-M. The disadvantage of parafilm-M is that I had to cut it ahead of time to make strips of the appropriate width. To get a good seal, I gently pull on the parafilm as I wrap it. This makes it stick to itself.
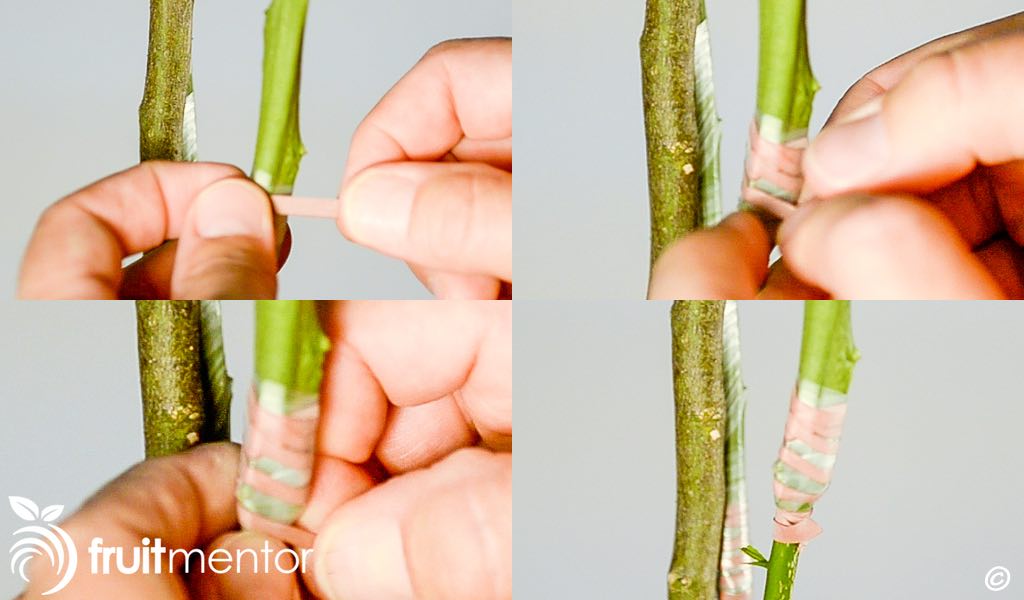
Wrapping with a Rubber Band
In order to ensure close contact between the cambium layers and to strengthen the graft while it is healing, I wrap the graft with a rubber band.
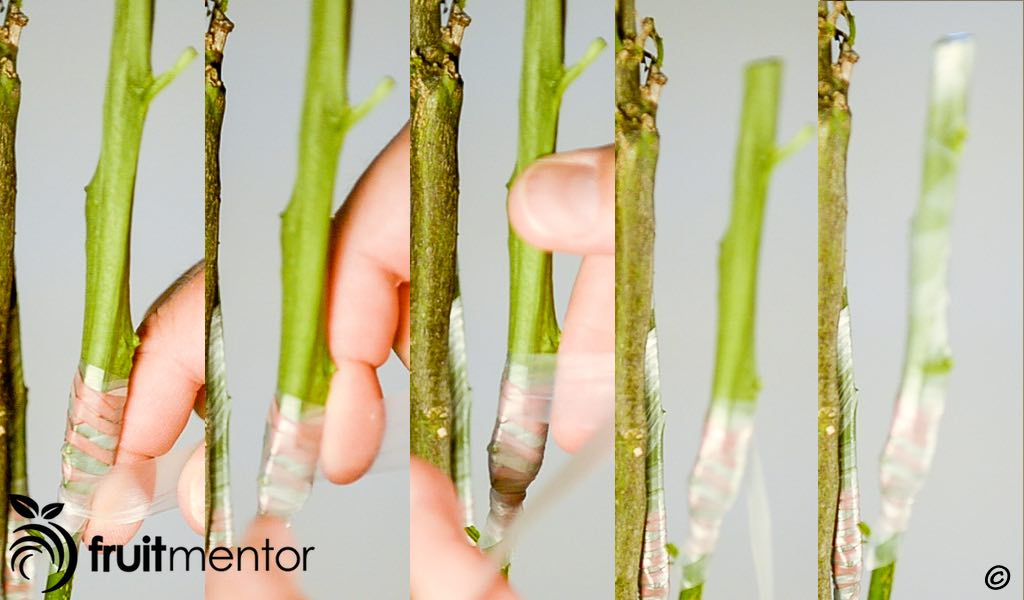
Wrapping with a Second Layer of Parafilm
Next I prune the scion to leave three or four buds and wrap the graft with a second layer of parafilm-M. I wrap starting from the bottom, overlapping as I go up. Overlapping the layers keeps the graft from drying out and will also keep out rainwater. Other than the buds, I completely wrap the scion, including the cut end.
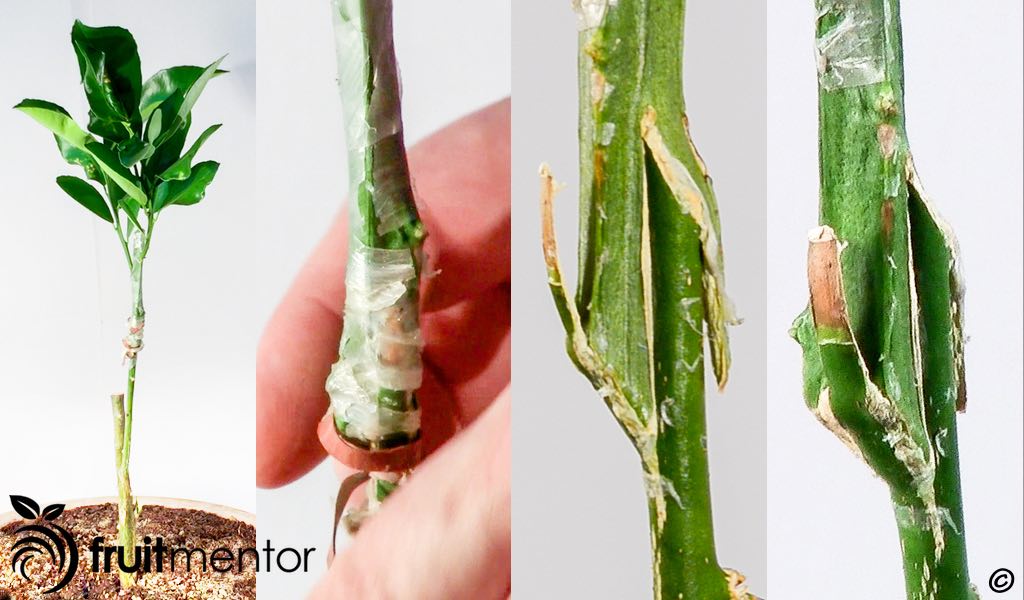
Grafting a Backup Scion
Since there were two rootstock suckers, I grafted two scions so that I would succeed even if one of the grafts failed. The graft that I showed above was my second graft (the backup). I am glad that I grafted the backup scion because I made a mistake on my first graft that is shown below. My mistake was to cut the scion such that the width of the scion was greater than the diameter of the rootstock. Because of this, the cambium layers did not touch on the top part of the Z.
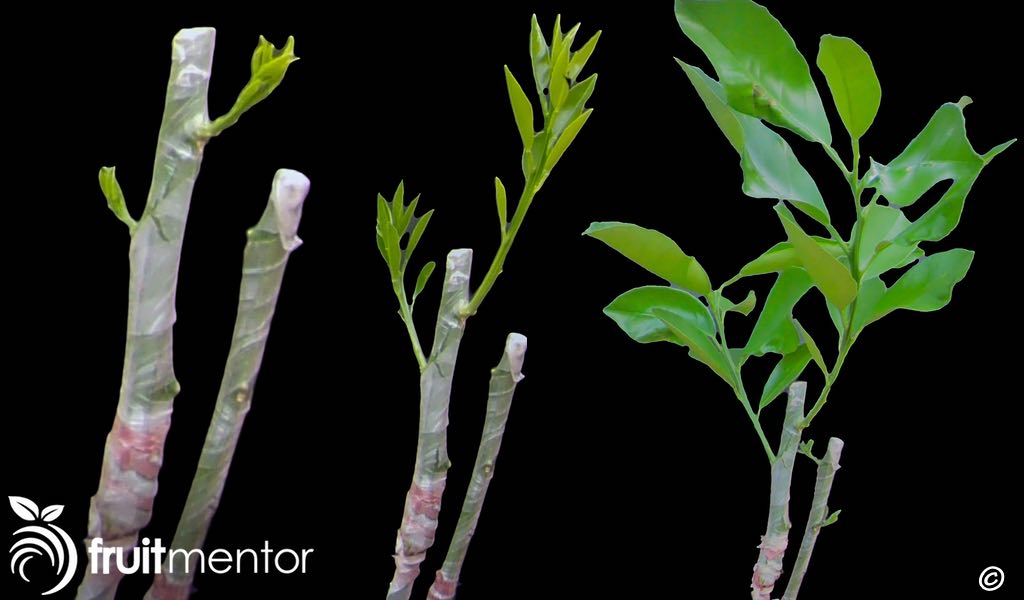
Citrus Z-graft Growing
I moved the tree to a shady area for three weeks for the graft to heal. The second graft began to grow four weeks after I moved the tree back into the sun.
Pruning off the Original Variety
After the second graft put on a bit of growth I cut off the original variety.
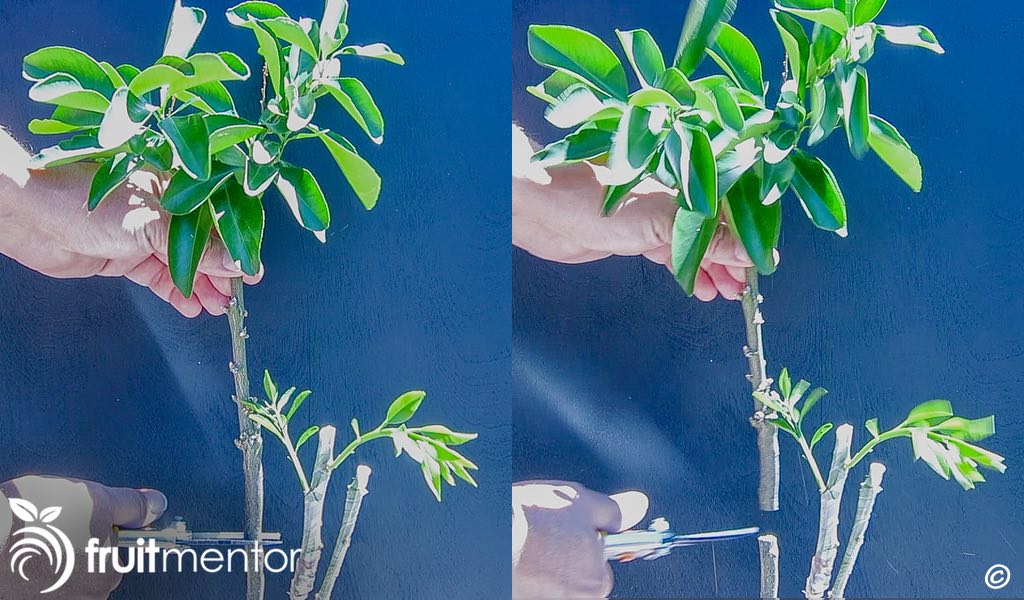
Picking the Winning Graft
The below photo shows the consequences of failing to connect the cambium layers at the top of the Z of the first graft. The graft was slow to grow because the cambium layers were only connected on the bottom. I pruned it off because the other graft did much better.
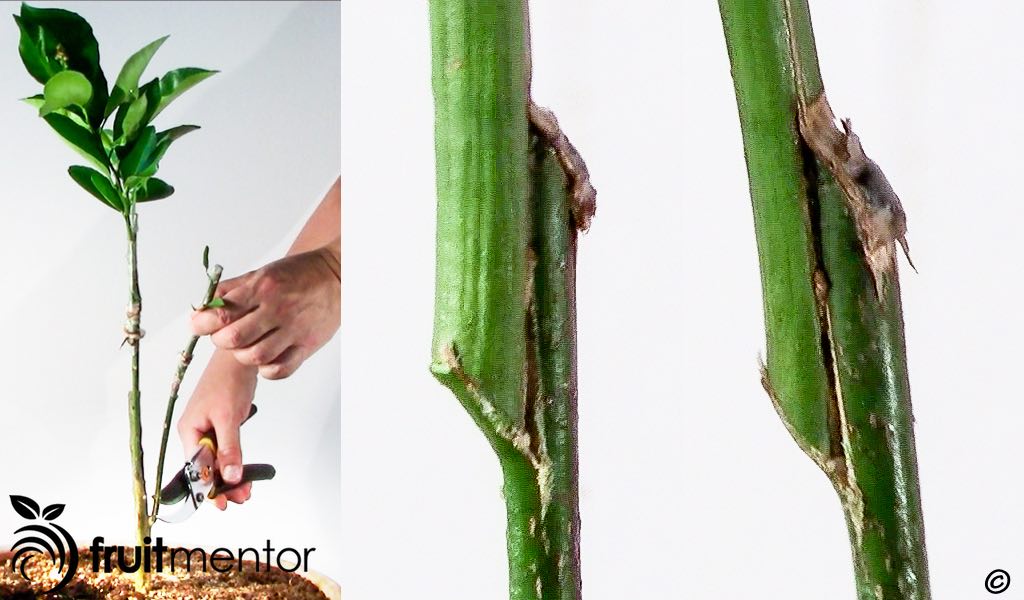
Healing of the Winning Graft
The winning graft healed well on the top and the bottom of the Z.
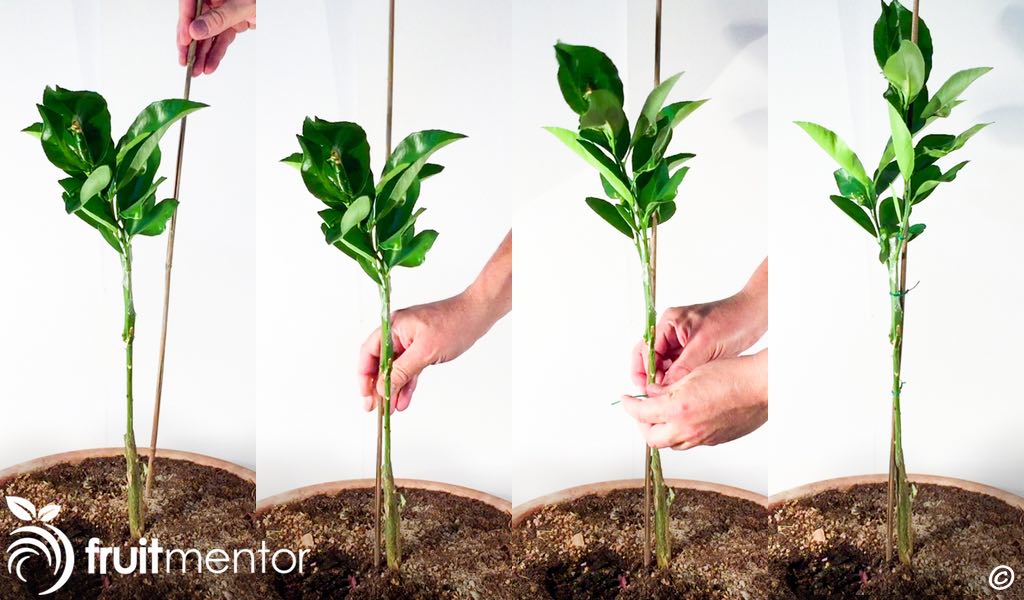
Staking the Tree
Next I staked the tree.
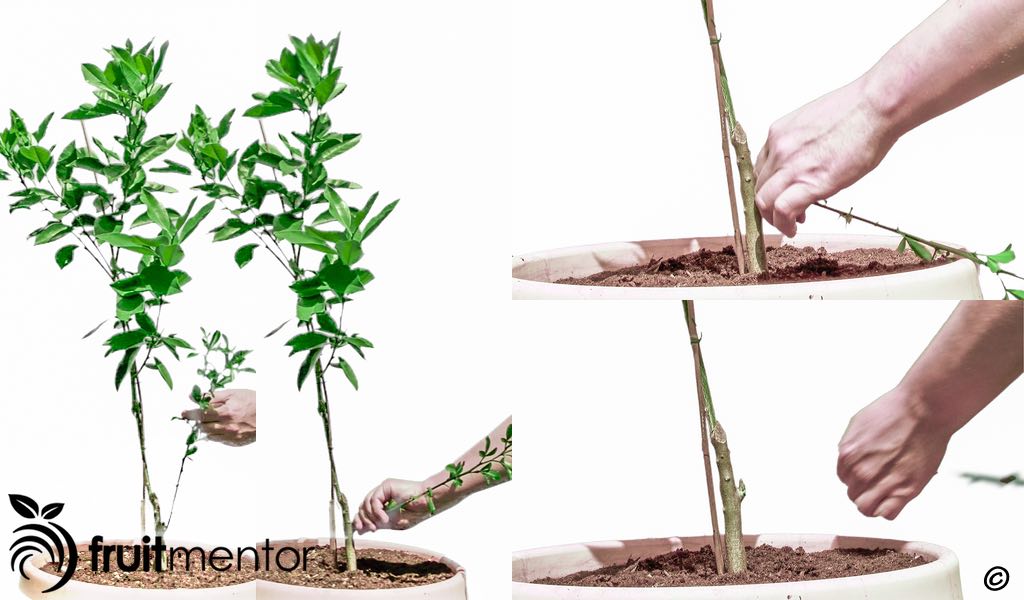
Removing a Rootstock Sprout
By the following spring the tree had put on more growth including a sprout from the rootstock. Rootstock sprouts must be removed before they take over and crowd out the grafted variety.
Finished Valentine Pummelo Tree
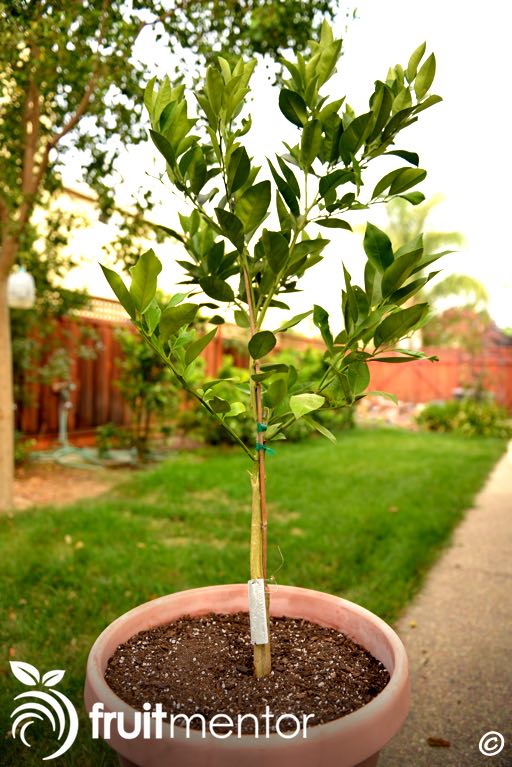
Here is the finished tree ready to plant after a few more months.
Save Trees by Sharing
Please share this article with anyone that you think may be interested in grafting fruit trees. Knowledge of the importance of using a registered disease-free budwood source when grafting citrus will help to prevent the accidental spread of deadly citrus diseases and will save trees.
Resources for Californians
Please visit CaliforniaCitrusThreat.org for more information on how to stop the spread of deadly citrus disease.
California Law Regarding Citrus Propagation
In California, the collection of any citrus propagative materials, including budwood and seeds, from non-registered sources is illegal. Any citrus trees grown or grafted in California must come from source trees registered with either:
- The Citrus Nursery Stock Pest Cleanliness Program, administered by the California Department of Food and Agriculture, or
- The Citrus Clonal Protection Program, located at the University of California at Riverside.
Funding
This article was funded by a grant from California’s Citrus Research Board.